Hope-Filled Fiction

  • HOME
  • ABOUT
    • Contact Carey
  • BOOKS
    • Women’s Inspirational
    • Middle Grade
  • NEWS

Blueberry Cinnamon Biscuits

July 23, 2013 by Carey Jane Clark

 photo 9c2d3d39-9e5d-4351-b060-d6251ee13eaa_zpseda17cd5.jpgMy discovery of a flawless gluten-free flour blend a few weeks ago has given us a new lease on baked goods. Not that we’re eating them every day, mind you, but it gives us options we simply never had before.

So when this week, I experienced yet another unprepared morning, having forgotten to start anything overnight, I reached for the gluten-free blend once again and whipped up a new and improved version of our favorite biscuits. And then made a few tweaks of my own. Wow!

While I rolled out my old biscuit recipe and cut them into shapes, with the blueberries in this recipe, you don’t want to do that, so just drop them onto a cookie sheet instead. My old biscuit recipe didn’t call for eggs, so there’s no vegan conversion required there, but I substitute coconut milk for the regular milk, and it’s totally guilt-free, and tastes even that little hint sweeter.

I’m telling you, I’m becoming fearless in the kitchen. I’m innovating all over the place, and the results are yummy!

Blueberry Cinnamon Biscuits

Ingredients:

  • 2 1/4 cups gluten-free flour blend
  • 1 cup coconut milk
  • 3 Tbsp. coconut oil
  • 1 Tbsp baking powder
  • 1-2 Tbsp honey
  • 1 tsp cinnamon
  • 2 tsp. lemon rind (optional)
  • 1 cup fresh blueberries

Directions

  1. Preheat oven to 350 F.
  2. Blend the baking powder together with the cinnamon, flour and lemon rind, if using. (We made these twice without the lemon rind and another time I decided to throw some in. Perfection!)
  3. Work in the 3 Tbsp coconut oil with a whisk or pastry blender.
  4. Add the blueberries next so they can be coated with the flour.
  5. Add the honey, according to your preference (we only add 1 Tbsp, and the kids love them, but my husband likes them a little sweeter)
  6. Add the coconut milk and work in until just blended, taking care not to “stab” your blueberries.
  7. Drop by large spoonfuls onto a cookie sheet and bake for about 10 minutes until the peaks are golden brown. Cool on a cooling rack.
  8. Enjoy!

Eating Vegan: Best Ever Banana Muffins

July 16, 2013 by Carey Jane Clark

I’ve often lamented in the past how eclectic my blog can be. Posts from an author who’s also an expat living in China who also homeschools her children can be that way, I suppose. However, recently, since we began eating vegan it seems the biggest excitement around here is in the kitchen. (Or maybe it’s just that most of my life is in the kitchen!)

It’s a good thing we’ve pared things down to a summer homeschool schedule (just math, Chinese and one other subject per day). Between searching for and planning vegan meals, to cooking and consuming them, it seems there isn’t much time for anything else! I’m having to learn a whole new way to cook.

While we have all but abandoned the idea of eating mostly raw (JavaMan was dwindling away to nothing), we are two months in now since our switch to eating vegan, and things are going well. My family doesn’t even seem to mind being guinea pigs as I experiment and innovate in the kitchen. In fact notably, Sweetpea, previously my pickiest eater, has actually confessed that her tastes are changing and she enjoys eating vegetables much more than she used to. This after eating a dish comprised mostly of spinach!

I’m thrilled to report that I even seem to have licked the breakfast challenge. I now have a set breakfast for each day of the week and most meals get a five-star rating from the kids (except one that everyone else loves and Sweetpea suffers through). What’s even better, most meals have an overnight component, so preparation in the morning is minimal.

Which works great when you remember the night before. And not so great when you don’t.

This morning was one of those mornings I woke up to the realization I’d forgotten to start breakfast the night before. So I dug out an old standby and tweaked it–a lot.

But here’s the thing: the recipe turned out better than the original. I kid you not. No one could ever have convinced me this could be so (especially when butter is no longer one of the ingredients), but it’s true. My “Best-Ever Banana Muffins” are even better.

Here’s my new-and-improved recipe:

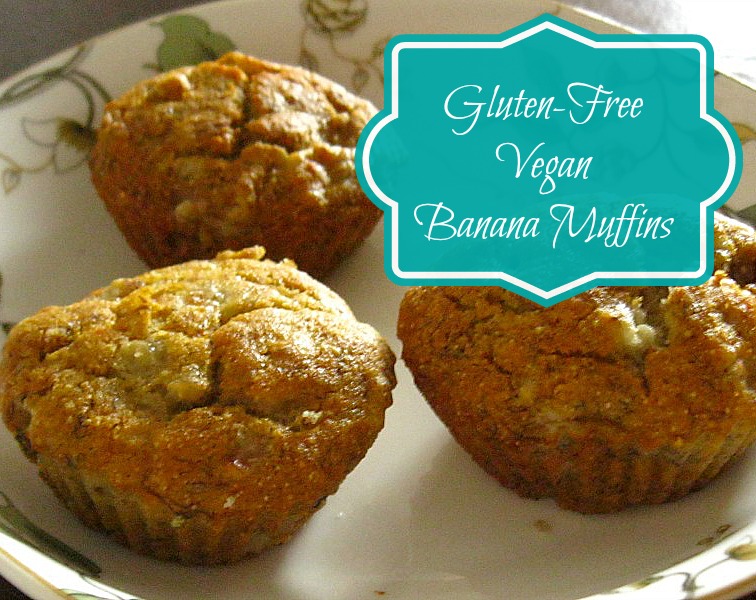
gluten-free vegan banana muffins

Gluten-Free Vegan Banana Muffins

(Makes 12 muffins)

Ingredients:

  • 1 flax egg (1 Tbsp. ground flax, 3 Tbsp. filtered water, mixed and refrigerated 15 minutes)
  • 1 cup gluten-free flour blend (see last week’s recipe for this amazing breakthrough)
  • 1/2 cup millet flour (this was a last-minute substitution because I didn’t have enough flour mix made up. Next time, I’ll try them with a full cup and a half of the GF mix)
  • 1 tsp. baking soda
  • 1 tsp. baking powder
  • 1/2 tsp. salt
  • 1/3 cup honey
  • 1/3 cup olive or grapeseed oil
  • 4 bananas, mashed

Directions:

  1. Mix the flax egg and refrigerate.
  2. Mash the bananas.
  3. Mix in the honey and oil, set aside.
  4. Mix the dry ingredients.
  5. Add the dry ingredients to the banana mixture and mix in the flax egg.
  6. Pour into muffin tins and bake 20 minutes at 350 F.
  7. Muffins are done when a toothpick inserted in the center comes out dry.

These muffins turned out lighter and fluffier than my buckwheat version and elicited rave reviews from all three kids. They even asked for a double recipe for tomorrow’s breakfast. I’ll have to mix up a new batch of GF flour!
signature.png

Yummy Vegan (and GF) Muffins

June 4, 2013 by Carey Jane Clark

I mentioned last week that our family has eliminated meat, dairy and eggs from our diet. I have been dabbling in this kind of diet for a while now, trying to add more vegetarian choices to our meals, then became convinced of the need to eliminate dairy and eggs altogether as well, but one of the reasons I stalled was the inevitable learning curve of a dietary change. Having switched to a gluten-free lifestyle in the last couple of years, I’m already a serious recipe tweaker. Now there are more tweaks.

However, I ordered a few cookbooks to help me through the transition, and things have been going smoother than I had anticipated.

One of my big kitchen challenges is breakfast. It has always seemed as though my kids were hard to please at breakfast time. Two would really enjoy something and the other one would hate it. And having now eliminated several options, I was not sure how this would work.

However, I’ve managed to find a number of breakfast selections THAT EVERYONE LIKES (!) so that I now have seven breakfast selections–one for each day of the week–that everyone is happy to eat. You have no idea what a breakthrough this is for me!

Here is just one of the delicious breakfast choices:

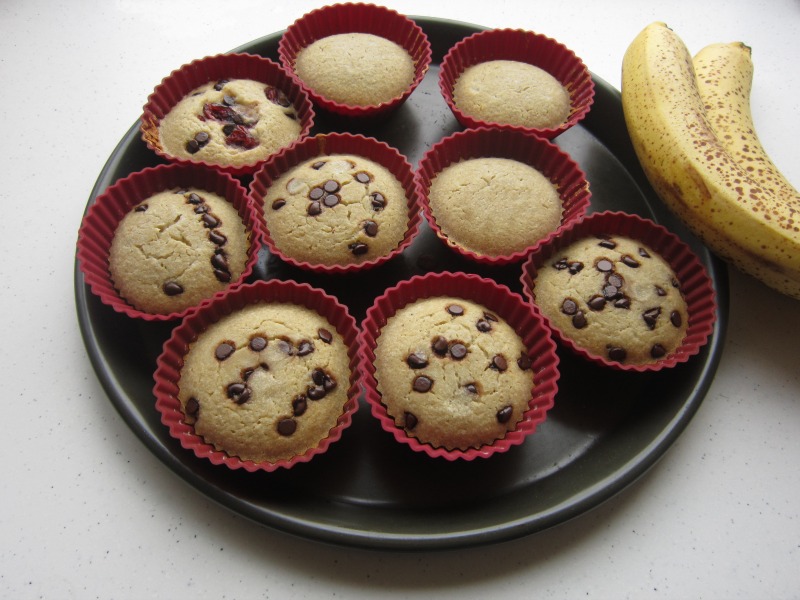
rice-millet-muffins

Rice/Millet Blender Muffins

yield 12 muffins (I actually made 21 smaller muffins from this recipe)

  • 1-1/2 cups long grain brown rice
  • 1/2 cup millet
  • 1-1/2 cups water

Soak the above ingredients overnight. This begins the germination process, breaks down phytic acid, which inhibits nutrient absorption, and makes the grain much easier to blend. It also makes for fluffier muffins.)

  • 1 apple, cored and cut into chunks
  • 1 tsp Himalayan pink salt
  • 2-4 Tbsp extra virgin olive oil
  • 1-3 Tbsp honey

Blend thoroughly until grain is only slightly gritty.

Add 1 Tbsp baking powder (aluminum free) at the end and blend just until mixed.

Variations: Substitute (non GMO) corn for millet in equal proportions. Substitute one or two ripe bananas in place of the apple. Add cocoa powder or sweetened chocolate chips. Add chopped nuts.

We made this recipe with apple the first time, then tried with banana and chocolate chips. Truly delicious both ways! My kids declared it their favorite muffin recipe (and I have some good ones)! I couldn’t be more thrilled.

signature.png

Mexican Beans and Rice

May 14, 2013 by Carey Jane Clark

A week ago, I mentioned I wasn’t sure what kind of diet we were eating. I believe I have decided.

A little more than a week ago, I began to eliminate meat and animal products (like eggs and dairy–the only dairy left in my diet was raw milk kefir) from my diet, and began eating a diet of 85% raw fruits and vegetables, and 15% cooked food.

It sounds like a radical decision, but there is some background to the story, which I will explain in the very near future. In the meantime, I’ve been on a quest to introduce my family to delicious foods that will convince them that this decision is liveable–even enjoyable. It’s had me scrambling, rifling through cookbooks and scouring the internet for new recipes. I’ve also ordered some cookbooks, but they are obviously on the slow boat to China.

I found this little gem in a book I bought some time ago, and never really explored fully. It’s brilliant because everything goes into one place and cooks together: the rice cooker. Hey, I have one of those!

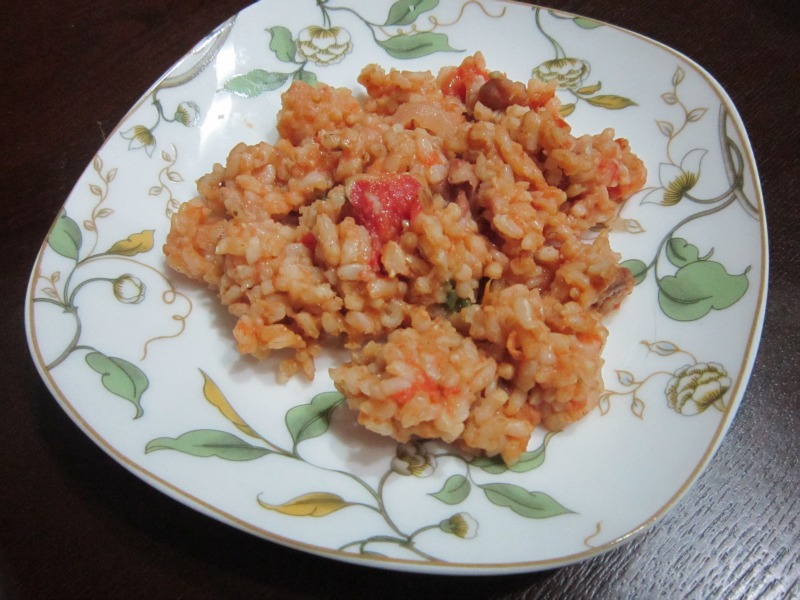
This recipe has been such a hit that my most picky eater has specifically requested it twice since I made it the first time. I made it (and took the picture of it) today, but didn’t have the red pepper the recipe called for. Still delicious!

The recipe calls for white rice, but I always cook with brown rice. I added the vegetables at about 20 minutes into the cooking cycle (which is about twice as long as that). Also, I used fresh tomatoes, not canned, so added them along with the onions to soften up a little before adding them into the rice cooker.

Enjoy!

Mexican Beans and Rice Ingredients:

  • 1 cup long-grain white rice
  • 1 cup chicken or veggie stock
  • pinch of salt
  • 1 Tbsp. olive oil or vegetable oil
  • 1 large yellow onion
  • 1 red bell pepper, halved, seeded, and sliced
  • 1 jalapeno chiles, seeded and minced
  • 1 15-oz can pinto beans, drained and rinsed
  • 1 15 oz can plum tomatoes
  • 1 tsp. crumbled dried oregano leaves
  • 2 Tbsp. capers, rinsed
  • freshly ground black pepper
  • 3 Tbsp. fresh cilantro leaves, chopped, for garnish

Directions:

1. Coat the rice cooker bowl with nonstick cooking spray or a film of vegetable oil. Add the rice, stock, and salt; swirl to combine. Close the cover and set for the regular cycle.
2. While the rice is cooking, heat the olive oil in a large skillet over medium heat. Add the onion and bell pepper and cook, stirring, until softened, about 5 minutes. Open the cover of the rice cooker and add the jalapeno, onion-pepper mixture, pinto beans, tomatoes, oregano, capers, and a few grinds of black pepper, stir to combine. Close the cover and let the cycle complete.
3. When the machine switches to the Keep warm cycle, let the rice steam for 10 minutes. Fluff the rice with a wooden or plastic rice paddle or wooden spoon. This rice will hold on Keep Warm for up to 1 hour.
4. Serve hot, garnished with the cilantro.

signature.png

Next Page »
Books
About Carey
  • Email
  • Facebook
  • Twitter

Carey is a participant in the Amazon Services LLC Associates Program, an affiliate advertising program designed to provide a means for sites to earn advertising fees by advertising and linking to Amazon.com. As an Amazon Associate, she earns from qualifying purchases. This site also participates in other affiliate programs and is compensated for referring traffic and business to these companies. This is at no extra cost to you. Thanks for clicking!

Privacy Policy
To Facebook Page

Copyright © 2025 · Beautiful Pro Theme on Genesis Framework · WordPress · Log in

This website uses cookies to improve your experience. We'll assume you're ok with this, but you can opt-out if you wish. Cookie settingsACCEPT
Privacy & Cookies Policy

Privacy Overview

This website uses cookies to improve your experience while you navigate through the website. Out of these cookies, the cookies that are categorized as necessary are stored on your browser as they are essential for the working of basic functionalities of the website. We also use third-party cookies that help us analyze and understand how you use this website. These cookies will be stored in your browser only with your consent. You also have the option to opt-out of these cookies. But opting out of some of these cookies may have an effect on your browsing experience.
Necessary
Always Enabled
Necessary cookies are absolutely essential for the website to function properly. This category only includes cookies that ensures basic functionalities and security features of the website. These cookies do not store any personal information.
Non-necessary
Any cookies that may not be particularly necessary for the website to function and is used specifically to collect user personal data via analytics, ads, other embedded contents are termed as non-necessary cookies. It is mandatory to procure user consent prior to running these cookies on your website.
SAVE & ACCEPT